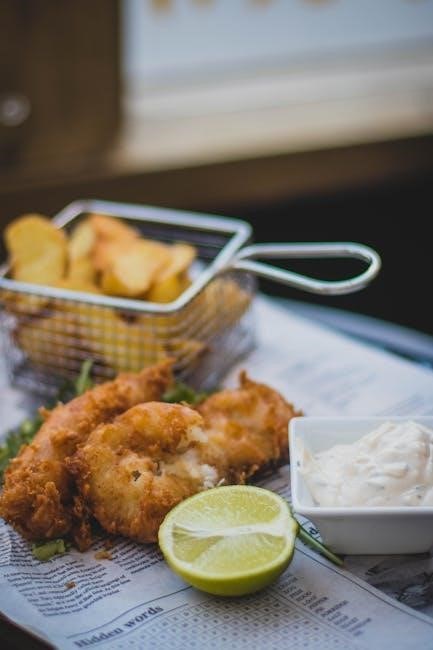
Welcome to the ultimate guide on cooking Ore-Ida fries! Discover how to achieve crispy, golden perfection using various methods like oven, air fryer, or skillet. Perfect for any meal!
Overview of Ore-Ida Fries
Ore-Ida fries are a beloved frozen potato product, offering convenience and delicious taste for home cooking. Available in various styles like Crinkle, Shoestring, and Regular, they cater to diverse preferences. Their pre-cut and frozen design saves time, making them ideal for quick meals. Whether baked, fried, or air-fried, Ore-Ida fries provide a crispy texture and flavorful experience, perfect for snacks or side dishes. Their versatility and ease of preparation have made them a staple in many kitchens, ensuring satisfaction for both beginners and experienced cooks alike.
Importance of Proper Cooking Techniques
Proper cooking techniques are essential for achieving crispy, flavorful Ore-Ida fries. The right methods prevent sogginess and ensure even cooking, while incorrect techniques can lead to undercooked or burnt results. Even heating and timing are crucial for a perfect texture. Using the right oil and temperature settings ensures a golden, crispy exterior and a fluffy interior. Proper cooking also enhances the overall taste and quality of the fries, making them a delicious addition to any meal. Following guidelines helps avoid common mistakes and guarantees satisfying results every time.

Cooking Ore-Ida Fries in the Oven
Cooking Ore-Ida fries in the oven is a simple and delicious method. Preheat to 400°F, spread fries evenly, and bake until crispy. Perfect for a quick meal with minimal oil.
Preparation Steps for Oven Cooking
Preheating your oven to 400°F is the first step. Line a baking sheet with parchment paper or lightly grease it. Spread Ore-Ida fries evenly across the sheet in a single layer. Avoid overcrowding to ensure even cooking. Pat dry excess moisture with a paper towel for crispier results. Optionally, drizzle with a small amount of oil and toss to coat. Season with salt or your favorite spices before baking for added flavor. Proper preparation ensures crispy, golden fries every time.
Temperature and Cooking Time Guidelines
Preheat your oven to 400°F (200°C) for optimal results. Spread Ore-Ida fries in a single layer on a prepared baking sheet. Bake for 15-20 minutes, flipping halfway through to ensure even cooking. For crinkle fries, cook for 18-22 minutes, while shoestring fries may require 12-15 minutes. Check for crispiness and golden color toward the end of the cooking time. Adjust the temperature or time slightly if needed, based on your oven’s performance and the fry type. Always refer to the package instructions for specific guidelines.
Tips for Achieving Crispy Fries in the Oven
For crispy oven-baked Ore-Ida fries, preheat your oven to 400°F (200°C) and ensure the baking sheet is hot before adding fries. Spread fries in a single layer, avoiding overcrowding. Pat dry excess moisture with a paper towel to enhance crispiness. Drizzle lightly with oil and sprinkle with seasoning. Flip fries halfway through cooking, and position the baking sheet in the middle rack for even browning. Avoid opening the oven too early, as this can prevent crisping. Perfectly golden and crunchy fries are just minutes away!

Cooking Ore-Ida Fries in the Air Fryer
Cooking Ore-Ida fries in the air fryer is quick and easy. Preheat to 400°F (200°C), cook for 8-10 minutes, and enjoy crispy, golden results effortlessly.
Benefits of Using an Air Fryer
Cooking Ore-Ida fries in an air fryer offers numerous benefits. It requires less oil, making it a healthier option while still achieving crispy results. The air fryer cooks fries faster than traditional oven methods and uses less energy. Additionally, it allows for even cooking and reduces mess, making cleanup easier. The air fryer’s compact design and precise temperature control ensure consistent outcomes, delivering perfectly cooked fries every time with minimal effort.
Step-by-Step Air Fryer Instructions
Preheat the air fryer to 400°F (200°C) for 5 minutes. Spread Ore-Ida fries evenly in the basket, avoiding overcrowding. Cook for 8-10 minutes, shaking halfway. For crispier fries, extend time by 2-3 minutes. Season immediately after cooking. This method ensures less oil usage while achieving a crispy texture. Adjust settings based on your air fryer model for optimal results. Always refer to the manual for specific temperature and timing guidance. Perfect for a quick, delicious snack or side dish!
Adjusting Cooking Time for Desired Crispiness
Cooking time in the air fryer can be adjusted for crispiness. Start with 8-10 minutes at 400°F for regular fries. For crinkle or thicker cuts, add 2-3 minutes. Shake the basket halfway to ensure even cooking. If you prefer extra crunch, extend time by 2 minutes but monitor to avoid burning. Adjust based on your air fryer’s power. Check fries halfway through to gauge doneness. Perfect crispiness is achieved when golden and firm. Season immediately for best results. Adjust timing as needed for your preference!
Microwave Cooking Instructions
For quick results, spread Ore-Ida fries on a microwave-safe plate. Cook on high for 3-4 minutes, check, and flip if needed. Serve hot!
Pros and Cons of Microwave Cooking
Microwave cooking offers quick results but has limitations. Pros include speed, convenience, and minimal cleanup. It’s ideal for small portions. Cons are uneven heating, potential sogginess, and risk of overcooking. Fries may lack crispiness compared to oven or air fryer methods. Requires close monitoring to avoid burning. While fast, it’s not the best for achieving perfect texture. Use this method for urgent needs but consider other techniques for superior results.
Recommended Cooking Time and Settings
For microwave cooking, start with 2-3 minutes for a small portion, 3-4 minutes for medium, and 4-5 minutes for a large serving. Check fries halfway through and shake the container for even heating. Adjust time based on microwave power (typically 600-1200 watts). Allow 30 seconds to 1 minute of standing time after cooking. Note: Results may vary; some microwaves cook faster. For best results, follow package instructions and adjust time as needed to avoid overcooking or undercooking. Always ensure fries are crispy and golden before serving.
Best Practices for Even Heating
For even heating, shake the container halfway through cooking to redistribute fries. Use a microwave-safe dish with a flat bottom to prevent overcrowding. Avoid stacking fries, as this can lead to uneven cooking. Check fries frequently during the last minute to prevent burning. If using a microwave with higher wattage, reduce cooking time slightly. Allow fries to stand for 30 seconds after cooking to crisp up. Following these steps ensures consistently cooked, crispy fries every time.
Cooking Ore-Ida Fries in a Skillet
Cooking Ore-Ida fries in a skillet offers a crispy texture with minimal oil. Heat a skillet with oil, add fries in a single layer, and cook until golden brown, flipping occasionally for even results.
Choosing the Right Oil for Pan Frying
Selecting the right oil is crucial for pan-frying Ore-Ida fries. Use oils with a high smoke point, such as vegetable or avocado oil, to ensure crispy results without burning. Avoid olive oil as it can become too smoky. Preheat the oil to the recommended temperature and maintain it consistently. Proper oil selection enhances flavor and texture, making your fries golden and delicious every time.
Heat Control and Frying Techniques
For pan-frying Ore-Ida fries, preheat oil to 350°F for optimal crispiness. Avoid overcrowding the skillet, as this lowers oil temperature. Fry in batches if necessary. Once golden, remove promptly. Use a slotted spoon to drain excess oil. Maintain consistent heat to prevent burning; Flip fries halfway for even cooking. Proper heat control ensures crispy exteriors and fluffy interiors, making your fries delicious and satisfying every time.
Drainage and Serving Tips
After frying, remove Ore-Ida fries with a slotted spoon and place them on paper towels to drain excess oil. This step ensures crispy texture and prevents sogginess. Serve hot for the best flavor. Consider seasoning immediately with salt or herbs for enhanced taste. Pair with your favorite dipping sauces, such as ketchup or aioli, for a delicious experience. For a restaurant-like presentation, garnish with fresh parsley or chili flakes. Timing is key—serve promptly to maintain crispiness and enjoy the perfect side dish or snack.

Deep Fryer Cooking Instructions
Preheat the deep fryer to 350°F. Carefully add Ore-Ida fries in batches, avoiding overcrowding. Cook for 3-5 minutes until golden and crispy. Drain excess oil thoroughly.
Setting Up the Deep Fryer
Preheat your deep fryer to 350°F, ensuring the oil reaches the recommended level. Use vegetable or peanut oil for optimal frying. Carefully place the fryer basket in position and ensure the lid is securely closed to prevent splatters. Always follow the manufacturer’s guidelines for oil quantity and temperature settings. Double-check that all safety features are active before starting. Once heated, the deep fryer is ready for frying Ore-Ida fries to a crispy, golden finish. Proper setup ensures even cooking and safety.
Optimal Temperature for Frying
The ideal temperature for frying Ore-Ida fries is between 325°F and 350°F. Maintaining this range ensures even cooking and prevents the fries from burning. Preheat the oil to 350°F for crispy results. Avoid overcrowding the basket, as this can lower the oil temperature. Fry in batches if necessary, and monitor the fries closely to achieve golden perfection. Adjust the temperature slightly if needed, but stay within the recommended range for the best outcome. Proper temperature control is key to achieving crispy, delicious fries.
Safety Precautions and Best Practices
When frying Ore-Ida fries, always use caution to avoid accidents. Ensure the deep fryer is placed on a stable, heat-resistant surface away from children. Never leave the fryer unattended while in use. Avoid overcrowding the basket, as this can cause oil to splatter. Use a thermometer to monitor oil temperature and prevent overheating. Keep a fire extinguisher nearby and never add water to hot oil. Allow the fryer to cool completely before cleaning. Always handle the basket with care to avoid burns. Follow these guidelines for a safe and enjoyable frying experience.
Common Mistakes to Avoid
Common mistakes when cooking Ore-Ida fries include overcrowding the pan, incorrect temperature settings, and not patting dry excess moisture. These errors can lead to soggy or unevenly cooked fries.
Overcrowding the Cooking Surface
Overcrowding the cooking surface is a common mistake that prevents Ore-Ida fries from cooking evenly. When too many fries are placed in the pan or oven, they steam instead of brown, leading to a soggy texture. To avoid this, cook fries in batches if necessary, ensuring they are arranged in a single layer. This allows proper air circulation, promoting crispiness. Overcrowding also increases cooking time, which can result in uneven cooking and poor texture. Always prioritize space for best results.
Incorrect Temperature Settings
Incorrect temperature settings can significantly affect the quality of your Ore-Ida fries. If the heat is too low, the fries may steam instead of crisp, leading to a soggy texture. Conversely, overly high temperatures can cause the fries to burn before they cook evenly. Always preheat your oven, air fryer, or skillet to the recommended temperature; For oven cooking, 400-425°F is ideal, while air fryers typically require 375-400°F. Monitor the fries closely and adjust settings as needed to achieve the perfect crispiness and avoid overcooking. Proper temperature control ensures consistent results and prevents burnt or undercooked fries, making it essential for achieving delicious, golden Ore-Ida fries every time.

Not Monitoring Cooking Time
Not monitoring cooking time can lead to overcooked or burnt fries, ruining their texture and flavor. Ore-Ida fries cook quickly, especially in air fryers or skillets, where they can go from perfect to burnt in minutes. Always check on them toward the end of the recommended cooking time and adjust as needed. For oven cooking, stay nearby after the 15-minute mark to ensure they don’t overbrown. Regularly shaking the basket or flipping the fries helps promote even cooking and prevents hot spots from causing uneven results. Staying attentive ensures crispy, golden fries every time without the risk of charring or undercooking.

Tips for Enhancing Flavor
Elevate your Ore-Ida fries by seasoning with garlic powder, paprika, or chili powder. Toss with herbs like parsley or rosemary, and serve with a side of tangy dipping sauces. Experiment with flavorful combinations to find your perfect match!
Seasoning Techniques
Enhance your Ore-Ida fries with creative seasoning blends. Sprinkle garlic powder, paprika, or chili powder for a spicy kick. For a herby flavor, toss with dried parsley, rosemary, or thyme. Pro tip: Season while fries are hot for maximum flavor absorption. Experiment with homemade mixes like smoked paprika and Parmesan cheese for a savory twist. Lightly drizzle with truffle oil or lemon zest for a gourmet touch. Let your taste buds guide you to the perfect seasoning combination!
Adding Herbs and Spices
Elevate your Ore-Ida fries by adding aromatic herbs and spices. Try garlic powder, dried oregano, or smoked paprika for a smoky flavor. For a Mediterranean twist, mix in rosemary and thyme. Pro tip: Sprinkle herbs after cooking to preserve their aroma and avoid burning. Combine cumin and chili powder for a spicy kick or Italian seasoning for a classic taste. Experiment with global flavors like curry powder or cajun seasoning to give your fries a unique twist. Herbs and spices add depth without extra oil, making your fries even more delicious!
Pairing with Dipping Sauces
Elevate your Ore-Ida fries with delicious dipping sauces. Classic options like ketchup, mustard, or mayo are timeless favorites. For a tangy twist, try ranch dressing or BBQ sauce. Spicy lovers will enjoy sriracha mayo or hot sauce. Experiment with cheese sauce for a creamy, indulgent treat or marinara for an Italian-inspired flavor. Pairing your fries with the right dip enhances their flavor and adds a personalized touch to your meal. Let your taste buds explore endless possibilities!

Cooking Times for Different Fry Types
Cooking times vary by fry type: regular fries at 400°F for 15-20 minutes, crinkle fries for 18-22 minutes, and shoestring fries for 12-15 minutes. Adjust as needed.
Regular Fries
Regular Ore-Ida fries are a classic choice, offering a balanced texture and flavor. For oven cooking, bake at 400°F for 15-20 minutes, flipping halfway for crispiness. In the air fryer, cook at 400°F for 10-12 minutes, shaking the basket midway. Pan frying requires 3-4 minutes per side in hot oil. Adjust times based on your preference for crunchiness. Always preheat and ensure even spreading for consistent results. These versatile fries pair perfectly with dips or as a side dish. Enjoy golden, delicious fries every time!
Crinkle Fries
Ore-Ida Crinkle Fries offer a unique texture with their ridged surface, enhancing crispiness. For oven cooking, bake at 400°F for 20-25 minutes, flipping halfway. Air fryer cooking takes 10-12 minutes at 400°F, shaking midway. Pan frying requires 3-4 minutes per side in hot oil. To achieve optimal crunch, avoid overcrowding and pat dry excess moisture. Crinkle fries are perfect for dips or as a side, delivering a satisfying bite every time. Follow package instructions for tailored results and enjoy their distinctive flavor!

Shoestring Fries
Ore-Ida Shoestring Fries are slender and delicate, perfect for a light, crispy snack. For oven baking, spread them on a baking sheet and cook at 400°F for 15-20 minutes, flipping halfway. In an air fryer, cook at 400°F for 8-10 minutes, shaking the basket for even crispiness. Pan frying requires 2-3 minutes per side in hot oil. To maintain their texture, pat dry excess moisture before cooking. Shoestring fries pair well with dips and are ideal for a quick, flavorful treat. Adjust timings for desired crispiness.

Troubleshooting Common Issues
Soggy fries often result from excess moisture or overcrowding. Pat dry before cooking and ensure even spacing for crispiness. Adjust timing for optimal results;
Soggy Fries
Soggy fries are a common issue when cooking Ore-Ida fries. Excess moisture, overcrowding the cooking surface, or insufficient heat can lead to this problem. To fix soggy fries, ensure they are evenly spread out during cooking. Pat them dry with a paper towel before cooking to remove excess moisture. Additionally, avoid covering the fries while they cook, as this traps steam and prevents crisping. If fries become soggy after cooking, try baking or air-frying them for a few extra minutes to restore crispiness. Proper air circulation is key to achieving the perfect texture.
Burnt Fries
Burnt fries can occur due to high heat or lack of monitoring during cooking. This is especially common in the oven or air fryer. To prevent burning, ensure even spreading of fries and avoid overcrowding. Regularly check on them, especially during the last few minutes of cooking. If using an oven, flip the fries halfway through the cooking time. For air fryers, shake the basket midway. Adjusting the temperature slightly lower can also help prevent burning while still achieving crispiness. Always follow package guidelines for optimal results.
Uneven Cooking
Uneven cooking can result in some fries being crispy while others remain soft or undercooked. This often occurs due to overcrowding the cooking surface or not stirring/floating the fries during the cooking process. To avoid this, spread the fries in a single layer and flip them halfway through cooking time. For oven cooking, use a parchment-lined baking sheet to promote air circulation. In the air fryer, shake the basket midway through cooking. Ensuring even distribution and monitoring the cooking process helps achieve uniformly cooked fries every time.

Healthier Cooking Options
Explore healthier ways to enjoy Ore-Ida fries by choosing baked or air-fried options, which use less oil for a guilt-free snack. Opt for low-calorie seasonings to enhance flavor without extra calories. These methods preserve the crispy texture while reducing fat intake, making them a better choice for health-conscious individuals seeking delicious yet nutritious meals.
Baked vs. Fried
Baked Ore-Ida fries offer a healthier alternative to fried ones, reducing calorie and fat content significantly. Baking retains the crispy texture while using minimal oil, making it a guilt-free option. Fried fries, while delicious, contain more calories due to oil absorption. For a lighter choice, baking is ideal, ensuring a flavorful snack without compromising on crunch. This method is perfect for health-conscious individuals seeking a balanced diet while enjoying their favorite fries. Baked fries are also easier to prepare and require less cleanup compared to frying.
Reducing Oil Usage
Minimizing oil is key to healthier Ore-Ida fries. Air fryers are ideal, using little to no oil while achieving crispiness. For baked fries, lightly spritz with oil or skip it entirely for a nearly oil-free option. Patting fries dry before cooking enhances crispiness without added oil. These methods reduce calorie intake while maintaining flavor, making your fries a healthier, tastier choice. Lower oil usage also means easier cleanup and a guilt-free snacking experience. Opt for these techniques to enjoy fries with less fat but full flavor.
Nutritional Benefits of Baked Fries
Baked Ore-Ida fries offer a healthier alternative to fried options, with fewer calories and less fat. They retain more nutrients like fiber and antioxidants from the potato. Baking preserves the natural flavors without added oils, reducing sodium and cholesterol. This method makes fries a better choice for health-conscious individuals while maintaining delicious taste. Opting for baked fries supports a balanced diet and is ideal for those looking to indulge without the guilt of excess oil.
Cooking Ore-Ida fries is simple and versatile, offering crispy results through oven, air fryer, or skillet methods. Enjoy perfect fries every time with these easy tips!
Cooking Ore-Ida fries can be done via oven, air fryer, microwave, skillet, or deep fryer. Each method requires specific techniques for crispiness. Preheat properly, avoid overcrowding, and monitor time. Adjust settings based on desired texture. For healthier options, baking is recommended. Experiment with seasonings and dips for extra flavor. Always follow package instructions for best results and ensure safety during cooking. Mastery comes with practice, so keep experimenting to find your perfect fry!
Final Tips for Perfect Fries
For flawless Ore-Ida fries, preheat your cooking appliance thoroughly and avoid overcrowding. Pat dry excess moisture before cooking. Monitor time closely and shake halfway for even crisping. Use high-quality oil for frying and season immediately after cooking. Experiment with herbs and spices for unique flavors. Don’t overseason—let the natural taste shine. Pair with your favorite dips for the ultimate experience. Remember, practice makes perfect, so tweak techniques to suit your preference for the crispiest, tastiest fries every time!
