
Aquabeads Instructions: A Comprehensive Guide (Updated 04/07/2026)
Dive into the captivating world of Aquabeads! This guide unveils the magic of creating stunning bead art, effortlessly transforming tiny beads into lasting treasures․
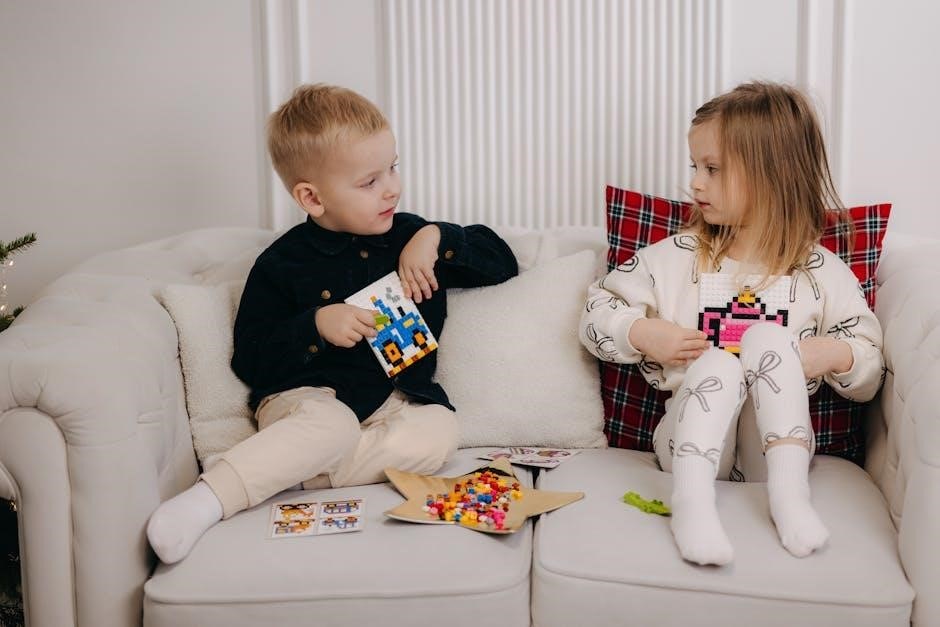
Simply choose a design, carefully place the beads, and with a spritz of water, witness the incredible fusion – make, spray, and stay!
What are Aquabeads?
Aquabeads are a captivating and innovative craft activity enjoyed by creators of all ages, offering a unique way to express artistic flair․ These tiny, colorful beads allow you to design and create beautiful, intricate bead art without any need for threading or ironing!
The core concept revolves around a simple, yet magical process: make, spray, and stay! You arrange the beads on specially designed layout trays to form your desired pattern, then gently spray them with water․ This activates a unique binding agent, causing the beads to magically fuse together, creating a solid, durable design․
Aquabeads offer endless possibilities, from replicating pre-designed templates to unleashing your imagination and crafting completely original creations․ It’s a fantastic way to develop fine motor skills, encourage creativity, and experience the joy of bringing your artistic visions to life․
The Basic Principle: Make, Spray, Stay!
“Make, Spray, Stay!” encapsulates the wonderfully simple yet effective process at the heart of Aquabeads․ It’s a three-step journey from scattered beads to a finished, fused creation, making it accessible and enjoyable for everyone․
Make refers to the initial stage – carefully arranging the Aquabeads on a layout tray, following a template or designing your own unique pattern․ Precision and patience are key here, as the bead placement dictates the final design․
Spray is where the magic happens! A light, even mist of water from the included spray bottle activates the beads’ special binding properties․ This crucial step initiates the fusion process․
Finally, Stay signifies the result – the beads permanently adhere to one another, forming a solid, colorful design that can be proudly displayed․ It’s a rewarding experience witnessing your creation come to life!

Getting Started: Essential Materials
Embark on your Aquabeads adventure! You’ll need bead sets, layout trays, and a spray bottle to unlock a world of creative possibilities and fun․
Aquabeads Bead Sets
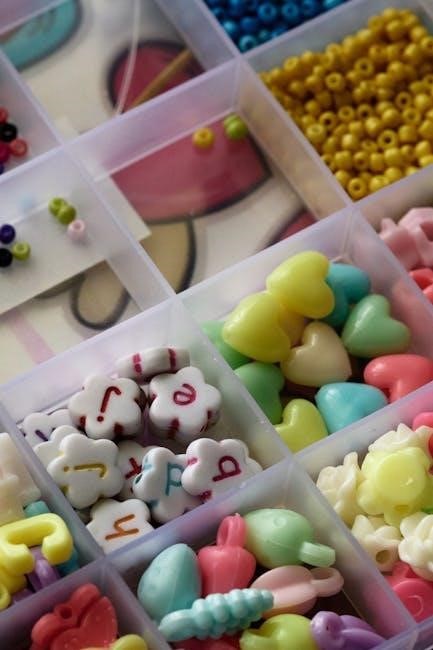
The foundation of every Aquabeads creation lies within its bead sets! These sets are available in a dazzling array of colors, allowing for limitless design potential․ From classic solid colors to shimmering glitter and soft pastel shades, the options are truly extensive․
Starter sets are perfect for beginners, providing a curated selection of beads to get you started․ As your skills develop, you can expand your collection with larger sets or individual bead refills․ Consider themed sets featuring popular characters or designs for instant inspiration․
Don’t underestimate the power of variety! Mixing different bead types – solid, glitter, and pastel – adds depth and visual interest to your artwork․ Explore the possibilities and let your imagination run wild with the vibrant world of Aquabeads!
Layout Trays & Tools
Essential for precise bead placement, layout trays are the workspace for your Aquabeads masterpieces! These trays feature a grid pattern, guiding you as you recreate designs from templates or create your own unique patterns․ They come in various sizes, catering to both simple and complex projects․
Beyond the tray, a selection of tools enhances the crafting experience․ Bead pens simplify the process of picking up and placing individual beads, especially for intricate designs․ Tweezers offer precision for adjustments and corrections․ Flipping tools aid in safely transferring your completed design for spraying․
Investing in quality tools streamlines the process and elevates the final result․ A well-equipped workspace ensures a more enjoyable and successful Aquabeads journey!
Spray Bottle – The Key to Fusion
The spray bottle is arguably the most crucial component in the Aquabeads process! It’s the magic wand that transforms a collection of individual beads into a solid, cohesive creation․ A fine mist of water activates the beads’ adhesive properties, causing them to fuse together permanently․

Using the correct spraying technique is paramount․ Even, consistent coverage is essential for a strong bond․ Avoid over-saturation, which can lead to warping or color bleeding․ A dedicated Aquabeads spray bottle delivers the optimal mist for flawless fusion․
Proper maintenance of the spray bottle – regular cleaning – ensures consistent performance and prevents clogging․ Mastering the spray is mastering Aquabeads!

Step-by-Step: Creating Your First Aquabead Design
Begin your Aquabeads journey with ease! Select a template, meticulously place beads onto the layout tray, and gently spray with water․
Witness the delightful fusion as your design magically comes to life – it’s simple, rewarding, and incredibly fun!
Choosing a Template
Embark on your Aquabeads adventure by selecting the perfect template! Aquabeads offers a vast array of designs, ranging from adorable animals and vibrant flowers to intricate patterns and beloved characters․
For beginners, we recommend starting with simpler templates featuring fewer beads and larger spaces – this builds confidence and familiarizes you with the process․
Explore the included design sheets with your bead set, or venture online for an even wider selection of free printable templates․ Consider your skill level and desired outcome when making your choice․
Don’t be afraid to experiment! Once you’re comfortable, you can even modify existing templates or create your own unique designs from scratch, unleashing your inner artist․
Remember, the template serves as a guide, so take your time and enjoy the creative process!
Placing the Beads
Now comes the fun part: bringing your chosen template to life, one bead at a time! Carefully pick up Aquabeads using the pen tool, gently tapping the tip into the bead container․
Refer to your template and begin placing the beads onto the layout tray, matching the colors and positions indicated in the design․ A steady hand and focused attention are key to achieving a neat and accurate result․
Work systematically, row by row, to avoid missing any beads or making errors․ Don’t worry about perfection; minor adjustments can be made before spraying․
Ensure the beads are snugly placed against each other, creating a solid surface for fusion․ This close contact is crucial for a strong and durable finished design․
Take your time and enjoy the meditative process of bead placement!
Spraying Technique: Achieving Perfect Fusion
The spray bottle is your magic wand! Hold the bottle approximately 6-8 inches away from the bead design, ensuring even coverage․
Apply a gentle, consistent mist of water – avoid heavy soaking, as this can cause warping or color bleeding․ Short, controlled bursts are more effective than prolonged spraying․
Begin spraying from one side of the design and slowly move across, overlapping each pass slightly․ Watch as the water activates the beads, causing them to magically fuse together!
Allow a few minutes for the design to fully dry and harden․ Resist the urge to touch it prematurely, as this can disrupt the fusion process․
A successful spray results in a solid, unified creation – a testament to the Aquabeads magic!

Advanced Techniques & Design Ideas
Elevate your Aquabeads artistry! Explore 3D creations, experiment with diverse bead types, and master complex spraying for breathtaking, personalized designs․
Creating 3D Aquabead Designs
Unleash a new dimension of creativity with 3D Aquabeads! Moving beyond flat designs opens a world of possibilities, allowing you to construct intricate figures and captivating sculptures․
The key lies in building layer upon layer, carefully fusing each section before adding the next․ Start with a solid base and gradually build upwards, utilizing the layout trays to support your structure during the spraying process․
Consider using templates as a starting point, but don’t be afraid to deviate and experiment with your own unique shapes․ Reinforce weaker areas with extra beads and strategic spraying․ Remember, patience is crucial – allow each layer to fully dry before proceeding to ensure a stable and robust 3D creation․ Explore combining different bead types for added texture and visual appeal!
Pro Tip: Use toothpicks or skewers to temporarily support overhanging sections while they dry․
Using Different Bead Types (Solid, Glitter, Pastel)
Elevate your Aquabead creations with the diverse range of bead types available! Beyond the standard solid beads, explore the enchanting sparkle of glitter beads and the soft, delicate hues of pastel beads․
Glitter beads add a touch of magic and shimmer, perfect for highlighting specific details or creating dazzling accents․ Pastel beads offer a subtle and sophisticated aesthetic, ideal for floral designs or whimsical characters․
Don’t limit yourself to using one type per project – mix and match to create stunning visual contrasts and textures! Experiment with combining solid beads for structure, glitter beads for highlights, and pastel beads for shading․ Consider the overall mood and theme of your design when selecting your bead palette․
Creative Tip: Use pastel beads to create an ombre effect by gradually transitioning between different shades․
Advanced Spraying Techniques for Complex Designs
Mastering advanced spraying techniques unlocks the potential for intricate and detailed Aquabead designs! For larger or more complex creations, avoid over-saturation, which can cause warping or color bleeding․
Employ a pulsing spray – short, controlled bursts – to evenly moisten the beads without flooding the tray․ Angle the spray bottle to reach all areas, especially those with delicate features or tight corners․
For 3D designs, spray in layers, allowing each layer to fuse before adding the next․ This provides stability and prevents collapse․ Observe closely; beads should glisten, not pool in water․
If using a larger spray bottle, maintain a consistent distance from the beads․ Practice makes perfect – experiment to find the optimal spray pattern for your designs!

Troubleshooting Common Aquabead Issues
Encountering problems? Don’t worry! This section addresses frequent Aquabead challenges, offering solutions for beads that won’t stick, warped designs, and unwanted color mixing․
Beads Not Sticking?
Frustrated when your Aquabeads refuse to fuse? Several factors can contribute to this common issue․ First, ensure you’re using a sufficient amount of water – a light, even mist is crucial, not a heavy soak․
Secondly, check the spray bottle; a clogged nozzle or weak spray can hinder proper fusion․ Clean it thoroughly or consider a replacement․
Even distribution is key! Make sure every bead receives adequate moisture․ Also, confirm you’re using genuine Aquabeads, as off-brand beads may not adhere correctly․
Finally, allow sufficient drying time; rushing the process can lead to instability․ A gentle touch after spraying can also help settle the beads before drying completely․
Remember, patience and a little troubleshooting can resolve most sticking issues!
Warped or Bubbled Designs
Dealing with uneven Aquabead creations? Warping and bubbling often stem from uneven water distribution during the spraying process․ Too much water in one area causes expansion and distortion as it dries․
Employ a consistent, light mist across the entire design, holding the spray bottle at a uniform distance․ Avoid concentrating the spray on specific sections․
The layout tray’s surface also plays a role; ensure it’s perfectly flat․
Drying environment matters! Avoid direct sunlight or heat, as rapid drying exacerbates warping․ A cool, well-ventilated space is ideal․
Gentle pressure applied evenly across the design immediately after spraying can help minimize bubbles and promote a flatter finish․ Patience is key for a pristine result!
Color Bleeding & Mixing
Concerned about colors running together? Color bleeding in Aquabeads happens when water dissolves the dye from certain beads, causing it to spread and mix with adjacent colors․ This is more common with pastel and lighter shades․
Minimize contact time with water! Use a fine mist and avoid over-spraying․ A quick, even application is crucial․
Bead quality matters; some batches may be more prone to bleeding․
Immediate blotting with a clean, dry paper towel after spraying can help absorb excess water and prevent dye migration․
Consider design placement – avoid placing highly susceptible colors directly next to each other․ Careful planning and a light touch are your allies against unwanted color blending!

Aquabeads Safety Guidelines
Prioritize safety during creative fun! Always supervise young children, store beads securely, and use the spray bottle responsibly, following all precautions carefully․
Supervision for Younger Children
Aquabeads are a delightful activity, but require adult supervision for younger children․ Small beads present a potential choking hazard, so constant monitoring is crucial, especially for those under the age of four․ Ensure children understand not to ingest the beads and are aware of the risks associated with placing them in their mouths or noses․
A responsible adult should oversee the entire process, from bead selection and placement to spraying and design completion․ This includes guiding children on proper bead handling and demonstrating safe spraying techniques․ Creating a dedicated, well-lit workspace minimizes distractions and allows for focused supervision․ Regularly check the play area for stray beads to prevent accidental ingestion or stepping on them․
Remember, proactive supervision ensures a fun and safe Aquabeads experience for everyone involved, fostering creativity without compromising well-being․
Proper Bead Storage
Maintaining the quality and organization of your Aquabeads collection is essential for a seamless crafting experience․ Store beads in a cool, dry place, away from direct sunlight and moisture, which can affect their ability to fuse properly․ Utilizing the original containers or small, labeled storage boxes is highly recommended to prevent color mixing and loss․
Categorize beads by color and type – solid, glitter, pastel – for easy access during design creation․ A bead organizer with individual compartments is an excellent investment for larger collections․ Regularly check for any damaged or deformed beads and discard them to maintain the integrity of your supply․
Proper storage not only extends the lifespan of your beads but also streamlines the creative process, allowing you to focus on bringing your Aquabead visions to life!
Spray Bottle Usage & Precautions
The spray bottle is pivotal to Aquabeads success, but requires careful handling․ Always use the designated Aquabeads spray bottle, as others may contain impurities affecting fusion․ Hold the bottle approximately 6-8 inches from the beads, applying a fine, even mist – avoid over-saturation, which can cause warping․
Spray in a well-ventilated area and protect surfaces with newspaper or a crafting mat․ Never spray directly into your eyes or mouth․ Adult supervision is crucial when children are using the spray bottle․ After use, empty any remaining water to prevent clogging and maintain optimal performance․
Regularly clean the nozzle with a damp cloth to ensure a consistent spray pattern, guaranteeing perfectly fused Aquabead creations every time!

Beyond the Basics: Expanding Your Aquabead Creativity
Unleash your inner artist! Design freely without templates, explore charming accessories, and proudly showcase your unique, sparkling Aquabead masterpieces with flair․
Custom Design Creation – No Templates Needed!
Embrace the freedom of imagination! Once you’re comfortable with templates, venture into the exciting realm of designing your own Aquabead creations from scratch․ Let your creativity flow – sketch your ideas on paper first, or simply begin placing beads directly onto the layout tray․
Don’t be afraid to experiment with different shapes, colors, and patterns․ Consider pixel art inspiration from video games or translate favorite images into bead form․ The possibilities are truly endless! Start small with simple designs and gradually increase complexity as your confidence grows․
Remember to plan your design carefully to avoid running out of beads mid-creation․ This skill unlocks a whole new level of artistic expression, allowing you to bring your unique visions to life with Aquabeads!
Aquabeads Accessories & Charms
Elevate your Aquabead creations with delightful accessories and charming additions! Aquabeads offers a fantastic range of accessories designed to enhance your designs and add a personal touch․ Explore keychains, phone straps, and stands – perfect for displaying your finished masterpieces․
Charms, in various shapes and themes, allow you to personalize your beads even further․ Integrate them into your designs for a unique and eye-catching effect․ Consider creating bead-covered charms or attaching them to completed projects․
These accessories transform simple bead art into wearable keepsakes and charming decorations․ They’re a wonderful way to gift your creations or simply enjoy them in new and exciting ways, expanding the possibilities of your Aquabead artistry!
Displaying Your Finished Aquabead Creations
Showcase your stunning Aquabead artwork with pride! Once your designs are complete and fully dried, consider creative ways to display them․ Utilize the Aquabeads stands specifically designed to hold your creations upright, perfect for showcasing keychains or small figures․
For larger pieces, explore framing options – a simple frame can transform your bead art into a captivating wall decoration․ Alternatively, arrange multiple creations on shelves or display them within shadow boxes for a curated exhibit․
Don’t forget the practical side! Keychains and phone straps allow you to carry your art with you, while carefully placed designs can brighten up any room․ Let your creativity shine, both in making and displaying your Aquabead masterpieces!